Showing posts with label making jewelry. Show all posts

Sunday, August 10, 2014

H is for Howlite, Hematite & Headpin. ABC of Jewellery

Heyho, we've reached letter H in my ABC of Jewellery. This is a not-so-comprehensive guide to jewellery materials and techniques I use as well as inspirations and design styles.  is for Howlite, Hematite and Headpin .
 
Natural howlite                             Dyed, 'turquoise' howlite
Howlite is a porous, fairly matte, opaque stone. It is most often dyed artificially and re-named with a marketing term such as 'turquoise howlite,' 'pink turquoise,' 'howlite jasper' 'lapis jade' and all sorts of poetic names. In its natural state it is usually grey or white and indeed, is also often confused with 'white turquoise,' a much rarer mineral. The fact is, howlite is not turquoise. It's not jasper, jade or any other stone. It is what it is, a borate mineral that doesn't take a great polish, but can be dyed easily in beautiful colours and is perfect for fun and affordable jewellery.

Metaphysically it is the stone associated with awareness and wisdom. Natural healers believe howlite brings calm and relaxation to a troubled or anxious mind, relieves pain and helps with insomnia.
magnetised hematite beads
Hematite is ferric oxide, or in plane English, a form of iron ore. It is a shiny, charcoal grey or black. In its raw state it often appears red due to rust. The name 'hematite' comes from the Latin 'blood stone,' in reference to the redness. Sometimes the beads can be a bit heavy and not a good choice for earrings.
double stranded pearl choker with hematite focal (own necklace)
Hematite is often magnetised, which can be tricky to work with, or very useful in certain designs. When beading the double-stranded pearl necklace above, I placed a magnetic hematite bead at the centre of both strands to keep them neatly together and help the choker sit well. I am working on variations of the design at the moment.
Magnetic hematatite beads keep the strands from separating
As it is a raw form of iron, natural healers  use its energies for treating blood disorders. It it also the stone associated with grounding, calming and and clarity of thought.

Headpins
Headpins are a type of finding frequently used in jewellery making. They are basically a long pin with a 'stopper' on the end used for wiring up earrings, pendants etc. They resemble straight pins used in sewing but come in a wide range of sizes and metals. The ends are most often flat, but you can find more decorative ones with a bead on the end, or indeed you can make your own out of wire, hammering the end. Alternatively you can form a spiral at the end to keep the bead or stone from slipping off. You will need to harden the spiral, for example, with a rubber hammer.
work in progress, beads threaded on headpins &1 finished piece
H is also for Handy Hints and How Tos, which you will frequently find on my blog. Some are tutorials, some are more general tips.

I could have sworn H was for something else important?  Woops, I forgot my Etsy shop, Handmade by Amo'r!!  Why choose handmade? Because of the quality, uniqueness and attention to detail.
***

Previous posts in this series
A  B  C  (plus C for Crimping D E F  (plus F for Findings) G1 and G2

All of this series: ABC


Sunday, September 23, 2012

How to Tie Adjustable Slip Knots

This weekend I was explaining to a friend how to tie an adjustable slip knot to hang a pendant and remembered I had posted a tutorial on it for the Etsy Ireland blog about two years ago. So I thought I'd redo the post here on my own blog:  This tutorial is a little hard to photo so I hope it's easy to follow.

This is a really simple project, easy enough for those of you who can't bead or wont bead and just want to hang a pendant, ID badge or charm. You can also apply this technique to make a bracelet.

First get a long piece of chord. I find that leather, suedette or waxed cotton tend to work best. Ribbon isn't great. You need something that has grip yet will allow the knot to slide. It needs to be long enough to fit over your head + 8 inches. About 32 inches is a decent, workable length if you are medium to plus sized. Some may need a shorter piece, or longer piece. Whatever works for you.
Hang your pendant or charm in the middle of the chord before tying the necklace. Place the two loose ends of the chord flat on the table as pictured then fold one end over the other as shown. 
 

 Now bring the loose end of the folded piece away from you, back under the other strands. Then wrap it back over the top of the strands, towards you again.


 Repeat this two or three times, wrapping the chord over itself, working towards the bend in the loop you've created (to the left in these photos.)
On the final wrap, bring the short loose end through the loop as in the photo.  (For simplicity's sake I have only wrapped a couple of times here, but an extra wrap would be more secure.)
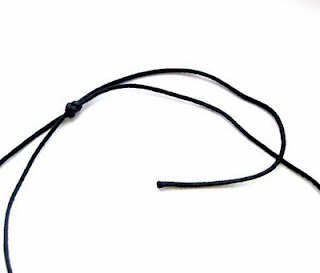
Pull that short end through the loop, (to the left) while at the same time pulling the longer strand on the far side of the knot in the opposite direction. (Do it slowly to check you are pulling the correct two pieces! If the knot isn't tightening and only moves, then you are tugging the wrong long strand.) The knot should be tightening and look like this.
 

You should end up with something like this. Now tie the other side to create a second knot. Just mirror what you just did, working to the right this time. Then tighten that knot too.


Tada! Two knots that you can slide away from each other to shorten the chord once it is over your head and slide towards each other to lengthen.
You can trim the loose ends close to the knot, leaving a small piece free to ensure the knot's stability. Depending on what material you have used, you may seal the end to prevent fraying using clear nail varnish, a drop of glue or in the case of leatherette, by carefully singing it. (Caution!!! And not to be carried out by children). Do not get glue or varnish onto the knot itself or it wont slide.
I hung this turquoise blue stone and copper pendant, 'Temptress,' on a long length of brown suedette using this technique.